Discover Different Techniques for Capturing Screenshots on Android, Including Default Shortcuts, Google Assistant, and Dedicated Screenshot Applications.
Capturing screenshots on your Android device can be accomplished through various methods, including manufacturer-specific, operating system-wide, and dedicated apps from the Google Play Store. With so many options available, it can be overwhelming to decide which method is best suited for your device. This guide will cover the most commonly used approaches for taking Android screenshots and introduce you to two highly recommended third-party apps for the task
1. Use the Android Screenshot Shortcut
The easiest and most common method to capture a screenshot on Android phones is to simultaneously press and hold the Power + Volume Down buttons. After a moment, an animation will appear on the screen, indicating that the screenshot has been successfully taken. You’ll also receive a notification in the status bar to confirm the action.
It’s important to time the button press accurately, as pressing the power button too early can lock the screen, while pressing the volume button too early may adjust the volume. If you find it challenging to use the physical buttons, Android Pie offers an alternative shortcut to take screenshots through the power menu, providing a more convenient option.
2. Use Manufacturer Shortcuts
While many Android phones utilize the standard method for taking screenshots, some devices have different button combinations. For instance, older Samsung phones require you to press both the Power and Home buttons to capture a screenshot, while newer models have adopted the Power + Volume Down method.
Once the screenshot is taken, the process remains the same. You’ll receive an on-screen confirmation and can view the captured image in your gallery app. Additionally, certain phones may include additional options even if they use the standard method.
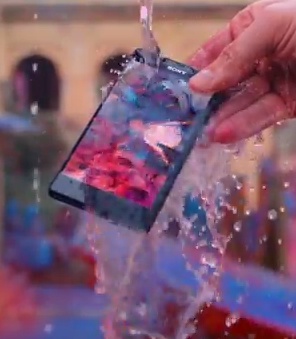
Certain Sony devices provide an alternative approach for taking screenshots. By pressing the Power button, you can access the Options menu and select the option to capture screenshots or record your Android device’s screen. Meanwhile, phones from Motorola and Google rely on the standard method for taking screenshots.
3. Use Gestures
Several Android devices offer gesture-based methods for taking screenshots, eliminating the need to use physical buttons. Samsung phones, for instance, provide the option to enable Palm Swipe to Capture by navigating to Settings > Advanced Features > Motions and Gestures.
Once enabled, triggering a screenshot using the Palm Swipe to Capture feature on Samsung devices is as simple as swiping your hand over the screen at a 90-degree angle. Motorola also provides a similar option, where tapping the screen with three fingers captures a screenshot. Be sure to consult the user manual to determine whether your device has an equivalent feature.
4. Use Quick Settings
Certain manufacturers have incorporated a dedicated screenshot button in Android’s Quick Settings menu. To access the menu, swipe down from the top of the screen. Depending on the device, you may find an option labeled Screen Capture, Screenshot, or a similar title.
If you don’t see the screenshot option in the Quick Settings menu, it could be hidden from view. To access it, you’ll need to customize the Quick Settings panel by tapping on the pencil icon. This allows you to add or remove shortcut buttons and tailor the menu to your preferences.
5. Ask Google Assistant to Take a Screenshot
Another convenient way to take screenshots on your Android device is by using voice commands with Google Assistant. Simply say “Hey Google” to activate the assistant and then request it to “Take a screenshot” for you. This feature can be particularly handy if you need to take a screenshot while multitasking, such as when cooking or eating while watching a video.
For Samsung phone users, Bixby might be a more reliable alternative to Google Assistant when taking screenshots. Some users have reported that Google Assistant fails to save screenshots to the gallery on Samsung phones, limiting the option to sharing them only. With Bixby, this is not an issue.
6. Use Third-Party Apps
Now, let’s explore a few of the top third-party screenshot apps. Although their fundamental purpose is similar to the built-in method, these apps provide unique features that are not available through the native options.
Screenshot Easy
Super Screenshot
7. Take Screenshots on Pre-Android 4.0 Devices
Before Android 4.0 Ice Cream Sandwich was introduced in October 2011, taking a screenshot using the operating system was not possible. While not many people still use older versions of Android on their phones, some may need to take screenshots using Gingerbread or Honeycomb, especially when using an old device. In this case, the best method for non-rooted devices is to use the Android SDK, although it can be cumbersome to set up.
For most users with Android 4.0 or later, taking screenshots natively is a simple process. However, if you’re looking for additional options, third-party apps are available. Alternatively, you can take advantage of the screenshot features included by your device’s manufacturer for the quickest and most efficient method.